How to reduce image file size on a Mac

Dan Counsell · Founder of Realmac SoftwareUpdated
We’ve made Squash, an image compressor for Mac, since 2016, so we show the free way first.
An image file is big for one of three reasons: it has more pixels than it needs, it’s saved at a higher quality than anyone will notice, or it’s in a format that doesn’t compress well. Fix any of them and the file shrinks. Fix all three and a 6 MB photo can come in under 300 KB.
1. Make it smaller
This saves the most. A photo straight from an iPhone is about 4,000 pixels wide, and a website rarely shows it wider than 2,000. Halving the width removes three-quarters of the pixels.
In Preview, choose Tools > Adjust Size, keep Scale proportionally ticked and type a new width. Our guide to resizing images on a Mac has the details.
2. Lower the quality
JPEG, WebP, AVIF and HEIC are lossy formats: they drop detail your eye won’t miss. The quality setting decides how much.
- Open the image in Preview and choose File > Export.
- Choose JPEG as the format.
- Drag the Quality slider left. Preview shows the file size as you go.
- Click Save.
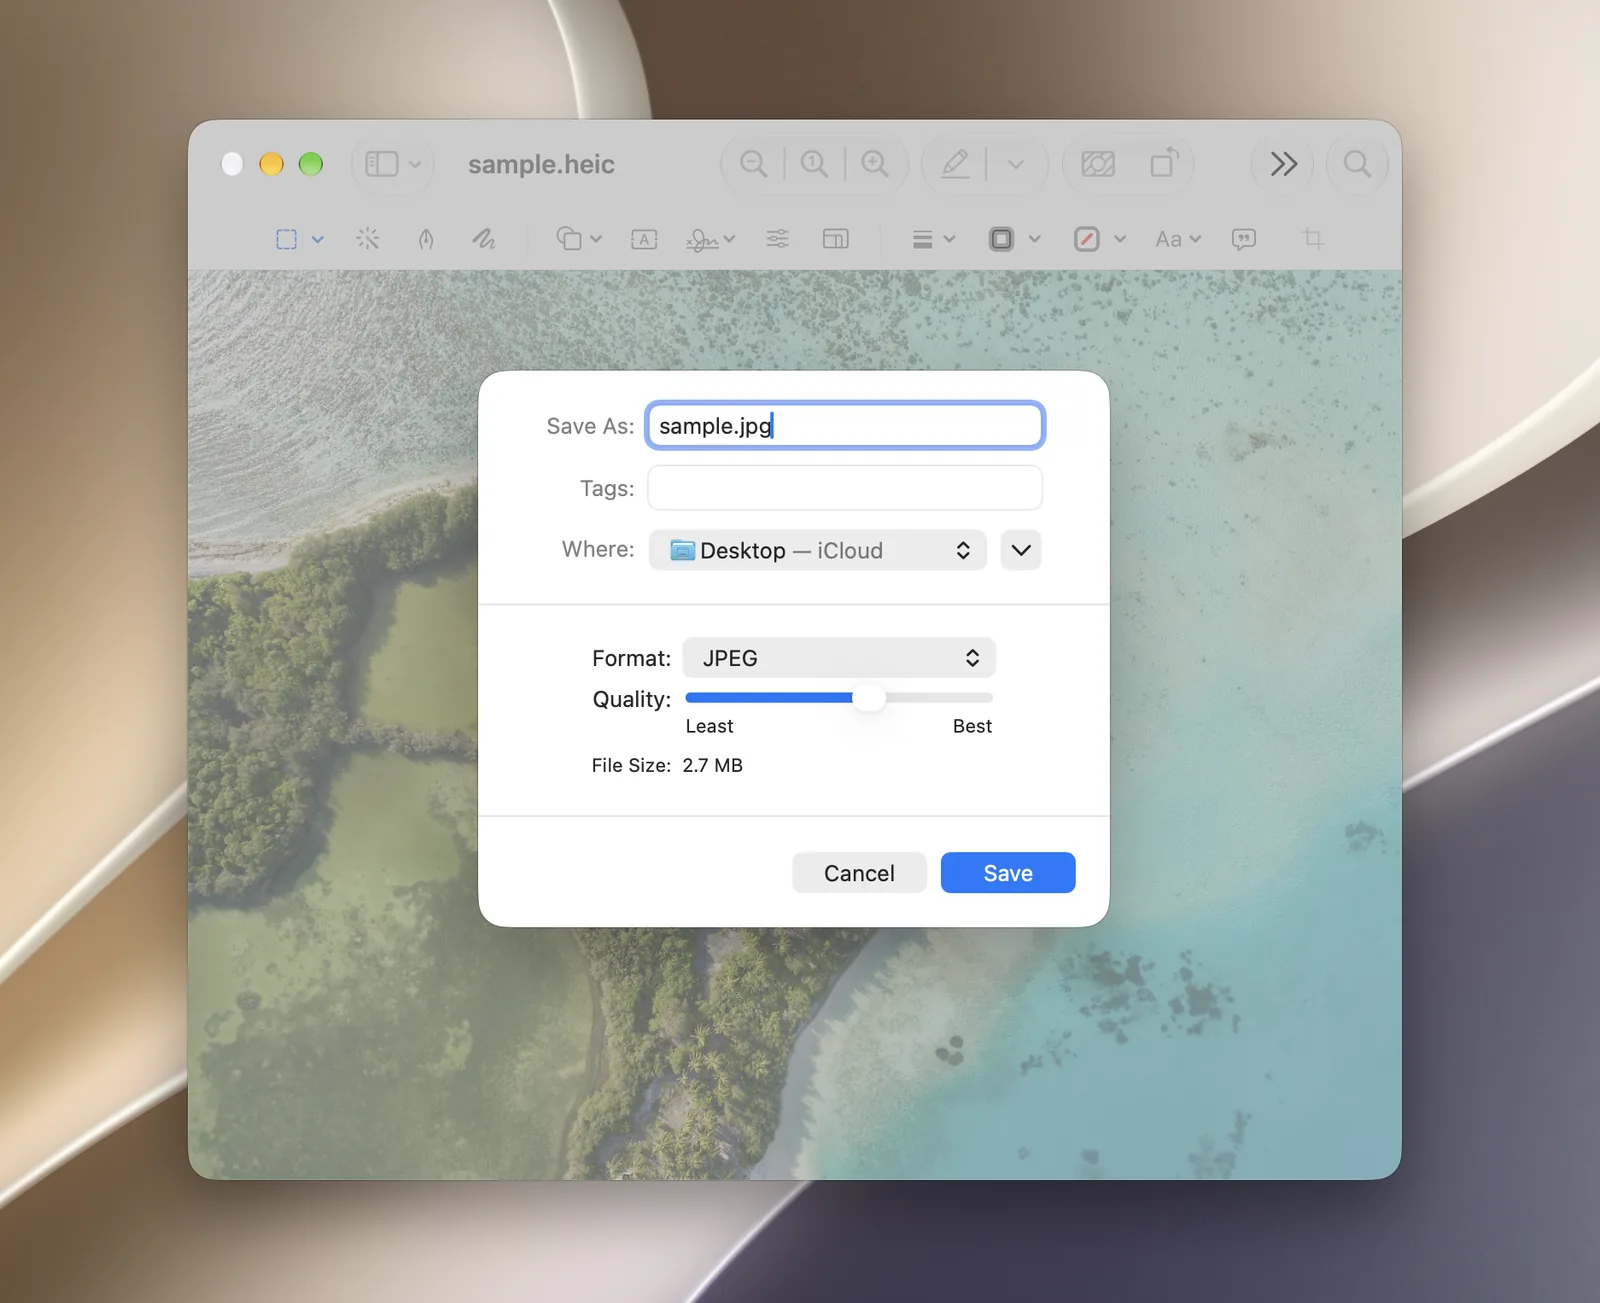
For most photos you can go a good way down before you see anything, though skies and smooth gradients show banding first. Look at the result at full size before you send it.
3. Change the format
| Format | Best for | Size |
|---|---|---|
| JPEG | Photos you send anywhere | Small |
| PNG | Screenshots, logos and graphics with sharp edges | Large for photos |
| WebP | Photos and graphics on websites | Smaller than JPEG |
| AVIF | Photos on websites | Usually the smallest |
| HEIC | Photos kept on Apple devices | Small |
A photo saved as PNG can be five times the size of the same photo as JPEG. Screenshots on a Mac are PNG by default, so they’re often far bigger than they need to be. See PNG vs JPG for which to use.
Compress a batch of images with Squash
Doing all three to one image in Preview takes a minute. Doing it to 200 product shots takes an afternoon. Squash does them together.
- Drop in the images.
- Set a size, a format and a quality. The split view shows the original and the compressed version side by side, so you can check before you export.
- Click Export Images.
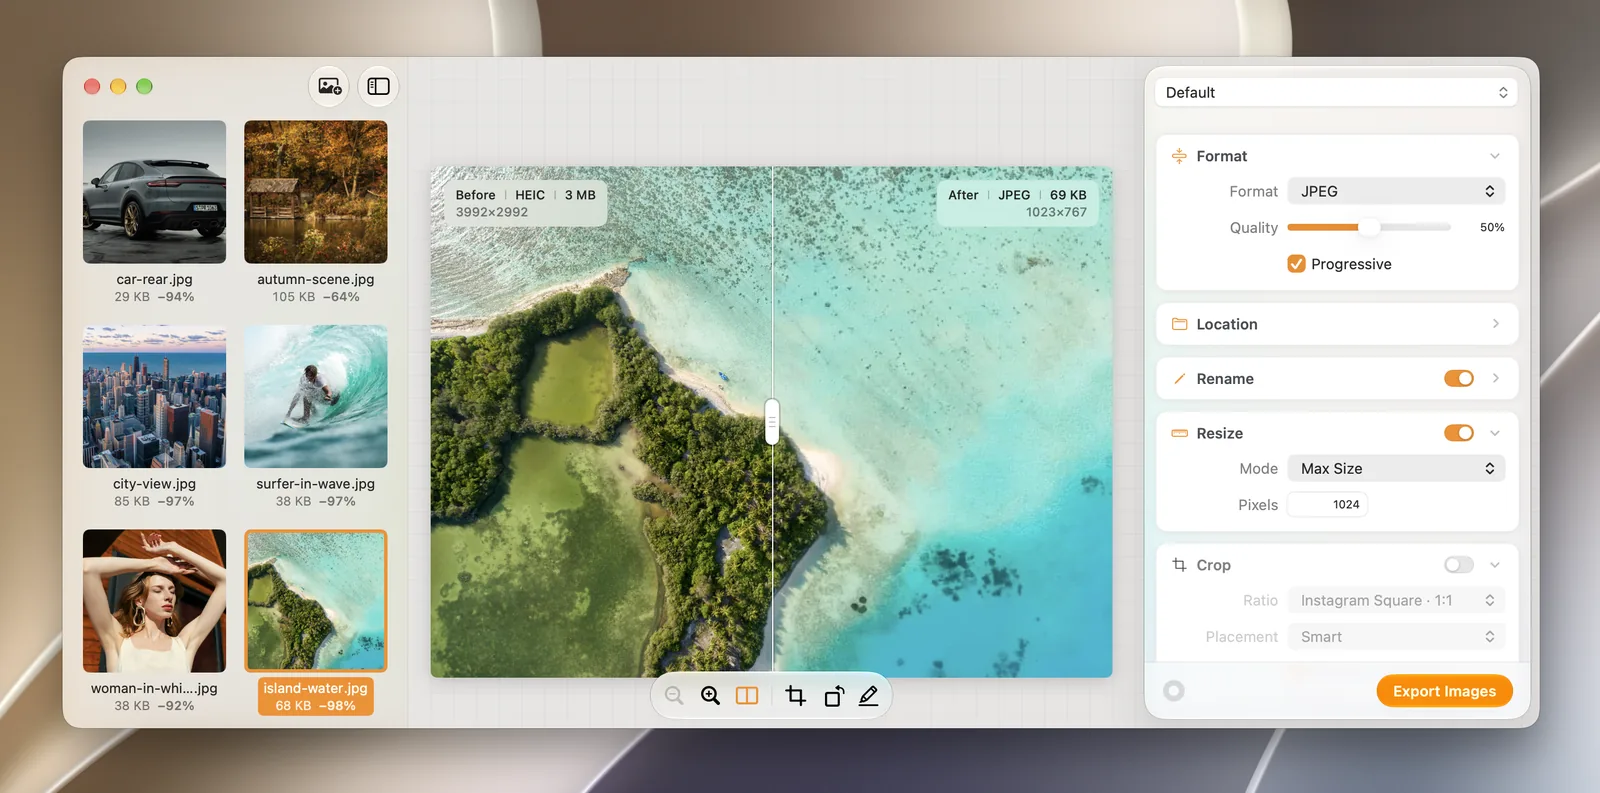
In the screenshot, a 3 MB iPhone photo at 3,992 × 2,992 pixels comes out as a 69 KB JPEG at 1,023 × 767 pixels, with the maximum size set to 1,024 pixels and the quality at 50%. That’s about 98% smaller, and it still looks sharp on screen.
Questions about reducing image size on a Mac
How do I reduce the file size of a JPEG on a Mac?
Open it in Preview, choose File > Export, keep JPEG as the format and drag the Quality slider left until the size shown is small enough. Making it smaller with Tools > Adjust Size saves even more.
How do I make a photo smaller to email on a Mac?
Resize it to about 1,200 pixels wide and save it as JPEG. In Mail you can also choose a smaller Image Size from the menu in the message window before you send.
Will compressing an image reduce its quality?
Lossy compression removes some detail, but at sensible settings you won’t see it. Lossless compression, which tools such as ImageOptim use by default, keeps every pixel but saves less.
How do I compress a PNG on a Mac?
PNG is lossless, so the quickest big saving is to convert screenshots and photos to JPEG or WebP. To keep PNG, use a tool that optimises PNG files, such as Squash or ImageOptim.