How to resize images on a Mac

Dan Counsell · Founder of Realmac SoftwareUpdated
We’ve made Squash, an image compressor for Mac, since 2016, so we show the free way first.
Resizing changes an image’s dimensions, the number of pixels across and down. It’s the single biggest way to make a file smaller: a 4,000-pixel photo cut to 2,000 pixels wide has a quarter of the pixels, and its file shrinks to match.
Your Mac can resize images without any extra software. Here’s how, for one image or a few hundred.
Resize one image with Preview
- Open the image in Preview.
- Choose Tools > Adjust Size.
- Make sure Scale proportionally is ticked, so the image doesn’t stretch.
- Type a new Width. The height changes to match. You can also pick a common size from the Fit into menu.
- Check the new file size shown at the bottom of the window, then click OK.
- Choose File > Save, or File > Export to keep the original as it is.
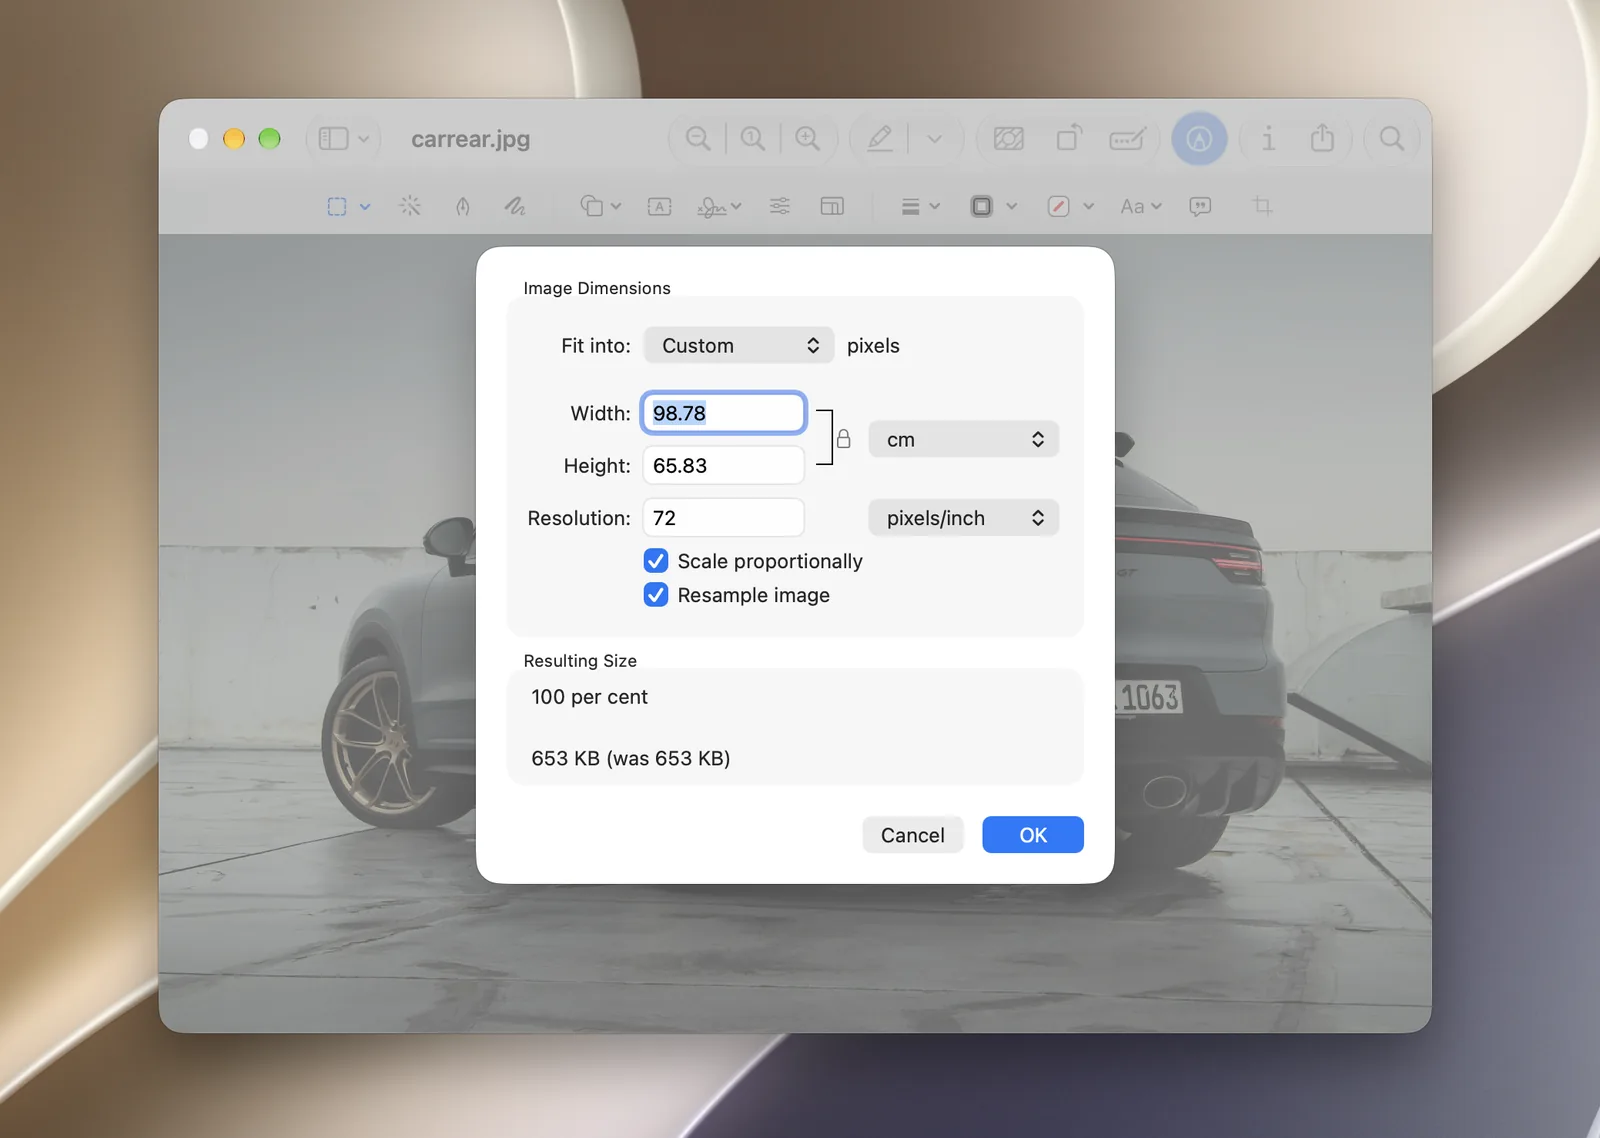
Leave Resample image ticked when you’re making an image smaller. Unticking it only changes the print resolution and leaves every pixel, so the file stays the same size.
Resize several images at once in Preview
Preview can resize a batch too, as long as they all need the same size.
- Select the images in Finder and open them together, so they share one Preview window.
- In the sidebar, select them all with Command-A.
- Choose Tools > Adjust Size, set the width and click OK.
- Choose File > Save to save them all.
This overwrites the originals, so copy the folder first if you want to keep them.
Resize with a Finder Quick Action
Select the images in Finder, Control-click and choose Quick Actions > Convert Image. Pick a format and one of the preset sizes, and the resized copies appear next to the originals. It’s quick, but you can’t type an exact width.
Batch resize images to an exact size with Squash
When you need every image at exactly 1,600 pixels wide, as WebP, renamed for your shop, the built-in tools take several passes. Squash does it in one.
- Drop in the images, or a whole folder.
- Set the size. Choose a width, a height, a percentage, or a maximum size that the longest side fits inside. The aspect ratio is kept.
- Pick the format and quality, then click Export Images.
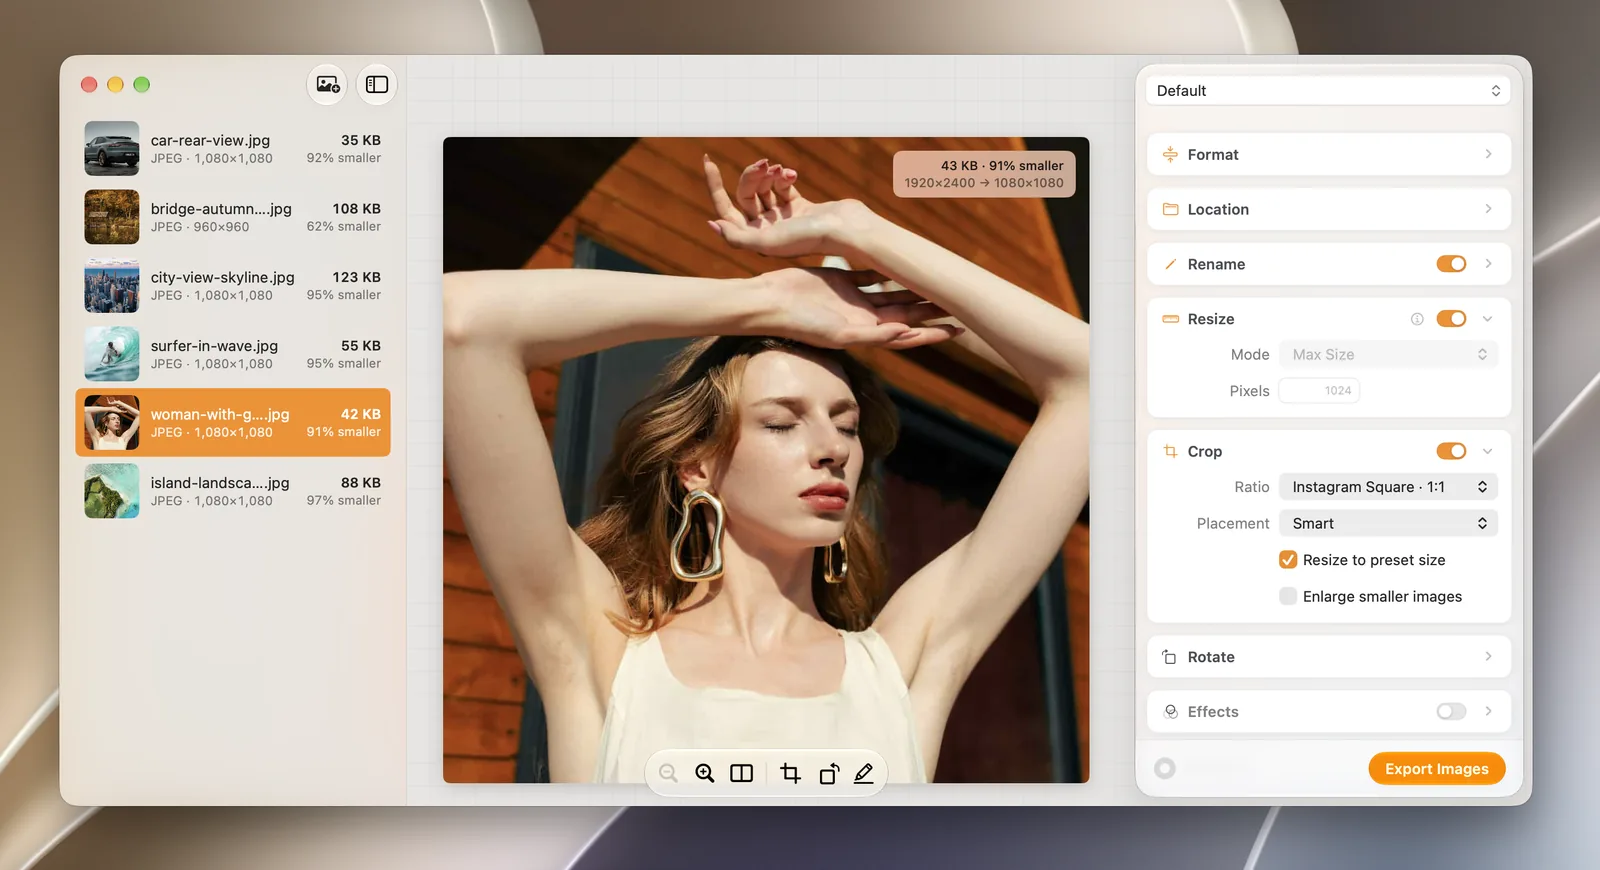
For a fixed shape, such as a square for Instagram, Smart Crop frames the subject for you. Save the settings as a preset and the next batch is one click.
What size should you choose?
| Where the image is going | Width to aim for |
|---|---|
| A full-width website photo | 1,600 to 2,400 pixels |
| A blog post or product photo | 1,000 to 1,600 pixels |
| An email | 1,200 pixels or less |
| A thumbnail | 300 to 600 pixels |
For more, read our guide to image sizes for the web.
Questions about resizing images on a Mac
How do I resize an image on a Mac without losing quality?
Making an image smaller always removes pixels, but at the size it’s shown you won’t see a difference. Keep Scale proportionally ticked so it doesn’t distort, and keep a copy of the original in case you need a larger size later.
How do I resize multiple images at once on a Mac?
Open them in one Preview window, select them all in the sidebar and choose Tools > Adjust Size. For different sizes, formats or renaming at the same time, use Squash.
What’s the difference between resizing and compressing?
Resizing changes the number of pixels. Compressing stores the same pixels in fewer bytes. Do both for the smallest files: see how to reduce image file size on a Mac.
Can I make an image bigger on a Mac?
Yes, in Preview’s Adjust Size window, but it can’t add detail that isn’t there, so enlarged photos look soft.