How to convert HEIC to JPG on a Mac

Dan Counsell · Founder of Realmac SoftwareUpdated
We’ve made Squash, an image compressor for Mac, since 2016, so we show the free way first.
Your iPhone saves photos as HEIC files. They look great and take about half the space of a JPG, but websites, older apps and many Windows PCs won’t open them. The fix is to convert them to JPG, and your Mac can do that without any extra software.
Here are four ways, from one photo to a few thousand.
| You have | Use | Time |
|---|---|---|
| One photo | Preview | 20 seconds |
| A handful in a folder | Finder Quick Action | 30 seconds |
| Photos still in your library | Photos, File > Export | A minute |
| A whole album, every week | Squash | A minute, then one click next time |
Convert one HEIC photo with Preview
Preview comes with every Mac and opens HEIC files.
- Double-click the HEIC photo to open it in Preview.
- Choose File > Export.
- Set Format to JPEG.
- Drag the Quality slider. Around three-quarters of the way is a good balance of size and detail.
- Click Save.
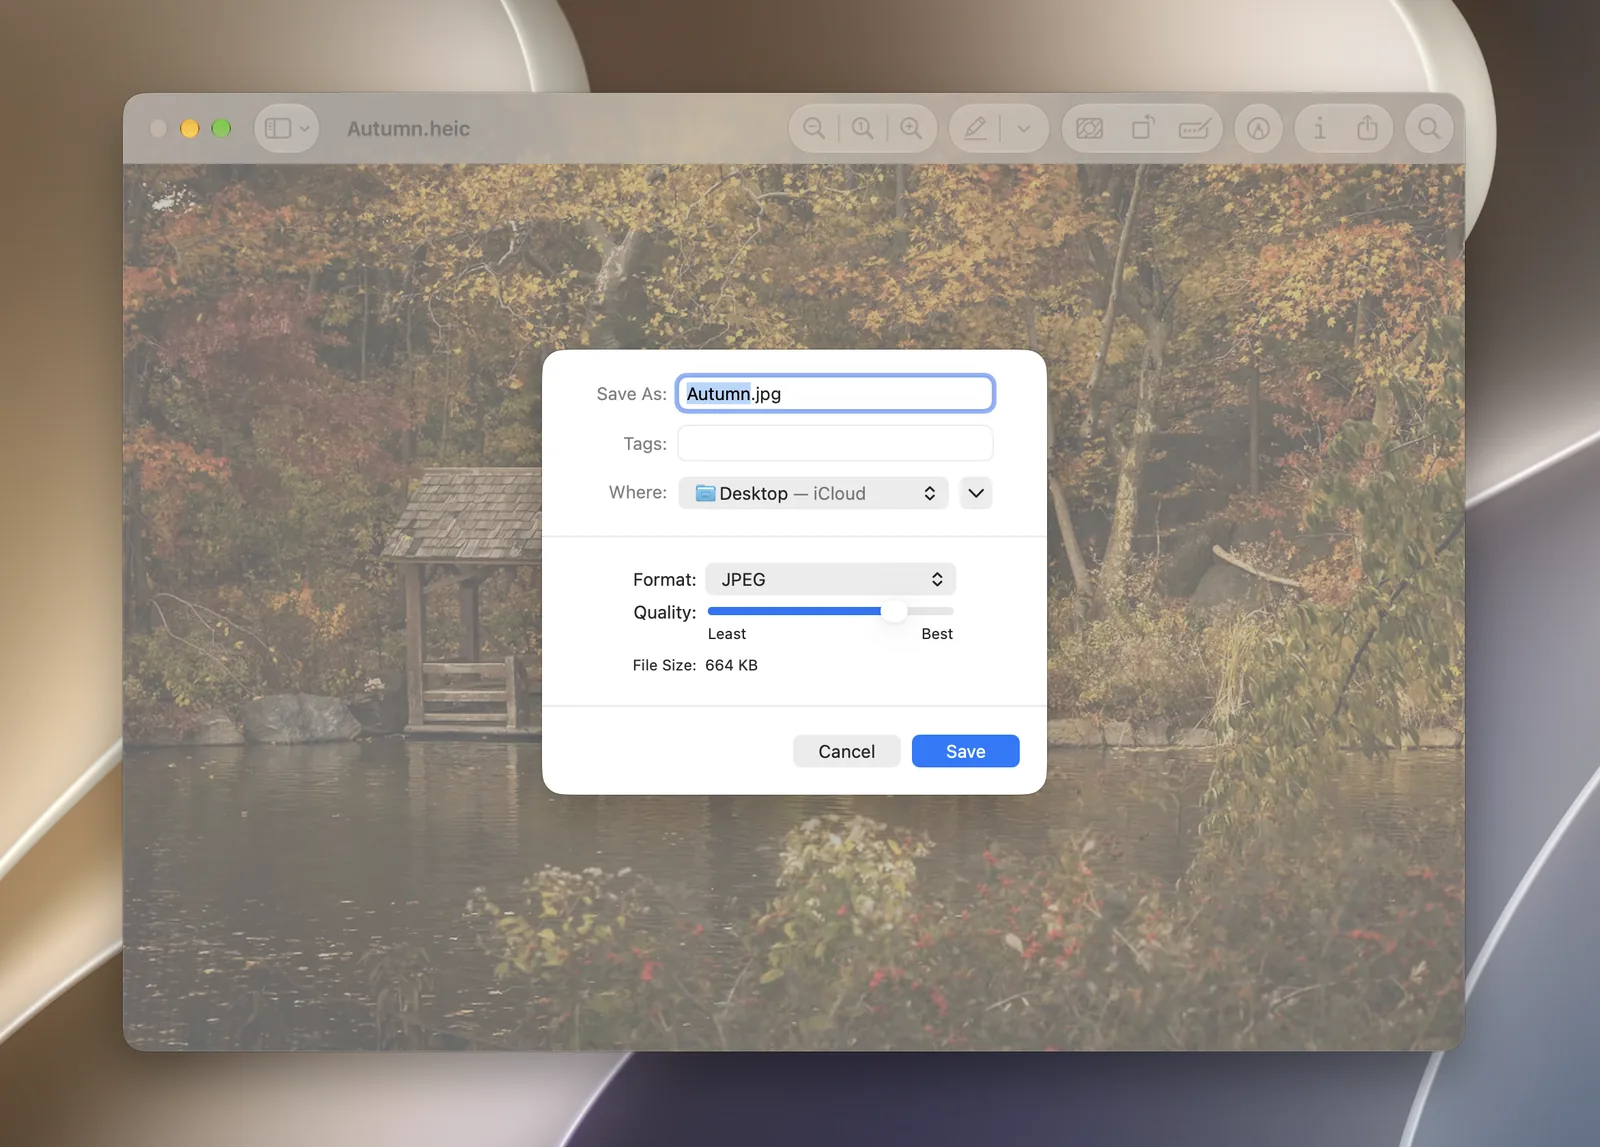
Preview can also convert several at once. Open all the photos in one Preview window, select them in the sidebar, then choose File > Export Selected Images, click Options and pick JPEG. It works, but there’s no way to resize or remove location data at the same time.
Convert a few HEIC files with a Finder Quick Action
This is the quickest free way when the files are already in a folder.
- Select the HEIC files in Finder.
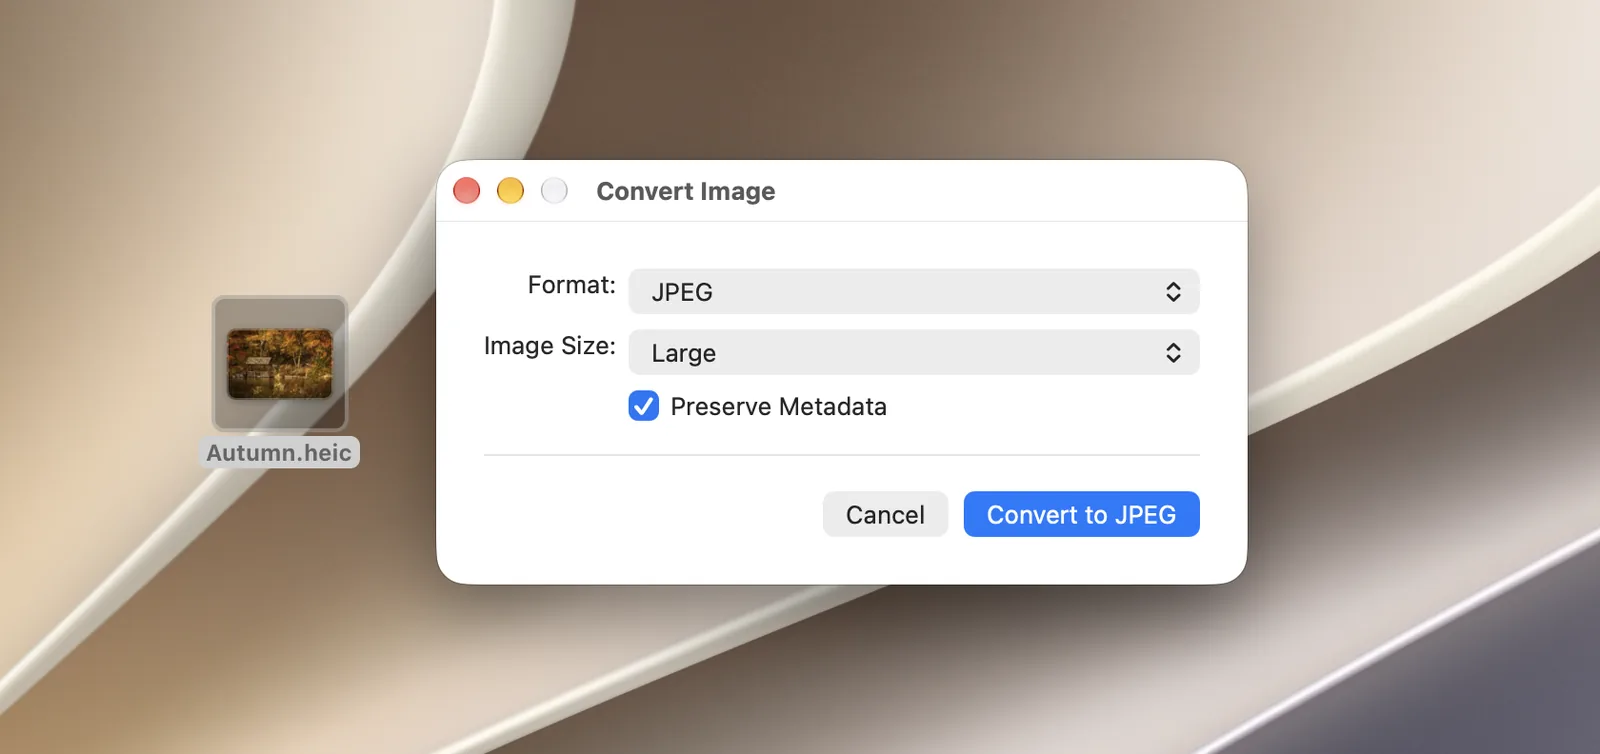
- Control-click one of them and choose Quick Actions > Convert Image.
- Choose JPEG as the format and pick an image size.
- Untick Preserve Metadata if you don’t want to share where and when the photos were taken.
- Click Convert to JPEG. The JPGs appear next to the originals.
Export HEIC photos from Photos as JPG
If the photos are still in your Photos library, export them as JPG instead of dragging them out (dragging gives you the HEIC originals).
- Select the photos in Photos.
- Choose File > Export > Export Photos.
- Set Photo Kind to JPEG, then choose a quality and size.
- Click Export and choose a folder.
Convert a whole album with Squash
When it’s 400 photos from a holiday, or you do this every week, the free tools get slow: each run means picking the format, the size and what to do with metadata again. Squash does the whole batch in one go and remembers your settings.
- Drop in your HEIC photos. Drag them from Photos, Finder or an SD card, one file or a whole folder.
- Choose JPEG and a quality. Use the quality slider, and set a maximum width if the photos are going on a website or into an email.
- Click Export Images. Export the whole batch, or drag single photos straight out to Mail or Finder.
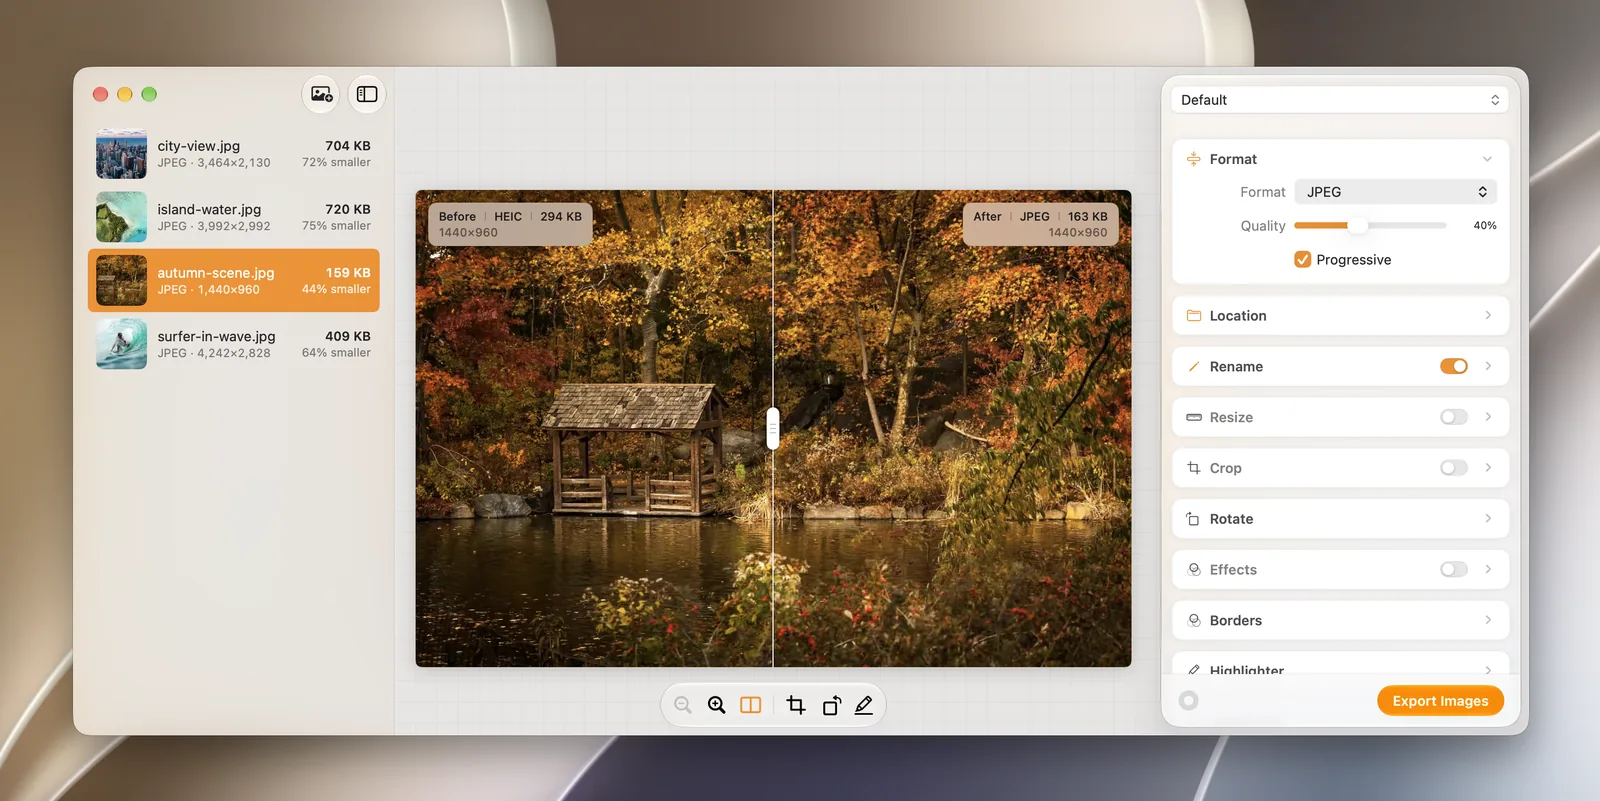
Save those settings as a preset, such as "iPhone to JPG", and next time it’s one click. With a licence you can also set up a watched folder, so any HEIC file you drop into it comes out as a JPG on its own.
What you’ll get
JPG files are usually larger than the HEIC originals at the same quality, because HEIC compresses better. If size matters, resize as you convert: a 4,032-pixel-wide iPhone photo shrunk to 2,000 pixels is plenty for a website or an email, and a fraction of the size.
Stop your iPhone saving HEIC in the first place
If you’d rather your iPhone took JPGs from now on, open Settings > Camera > Formats and choose Most Compatible. New photos are saved as JPG. Your existing HEIC photos stay as they are, and the files are bigger, so most people keep HEIC on the phone and convert when they need to share.
Questions about converting HEIC to JPG
Does converting HEIC to JPG lose quality?
A little, because JPG is a lossy format, but at high quality settings you won’t see the difference. Squash shows a before and after view so you can check at full zoom before you export.
Why are my iPhone photos HEIC?
iPhones save photos as HEIC by default because the files are about half the size of a JPG with the same quality. Read what a HEIC file is for more.
Can I convert HEIC to PNG on a Mac instead?
Yes. Preview, the Convert Image Quick Action and Squash can all save PNG. PNG files are lossless and much larger, so use JPG for photos unless you need PNG for a particular app.
How do I convert HEIC to JPG on a Mac without losing the date and location?
The date and location are stored in the photo’s metadata. Preview keeps it, the Convert Image Quick Action keeps it when Preserve Metadata is ticked, and Squash lets you choose exactly which metadata to keep.
Can I convert HEIC files on a Mac for free?
Yes. Preview, Finder and Photos are free and built in. Squash is free to download too: you can export 25 images on your first day and 5 a day after that, with no watermark.